Usually I write about food business and tell other people’s stories (except for the time I got to tour marzipan and chocolate Easter bunny factories in Germany). So you know I’m really stoked about something in my personal life when I write here—and it’s all because I want to share my discoveries with you.
I fancy myself quite the Handy Girl. Being able to do home repairs is like having a high-paid contract gig, at least in the San Francisco Bay Area. Here the price of handy people and painters (usually $40+, often $75+ on TaskRabbit) makes it is so worth being able to DIY small home repairs and upgrades.
What’s key is having the right tools—just as with any successful cooking experiment or pretty much anything in life. (A writer needs pen and paper or a good computer, car repair people have the appropriate tools, etc.)
Because I’m such a believer in the Life-Changing Magic of Cabinet Sliding Drawers, I wanted to share my hard-earned knowledge:
How and why the simple act of installing metal drawer inserts to organize my kitchen cabinets changed my life
Are your eyes rolling yet? It’s true! I can’t stop talking about my drawers, and I don’t mean my underwear.
If you live in an old house or apartment, you probably have kitchen cabinets with dark recesses where things you once thought were worth saving have found their home. My stash included a package of individual metal tart tins and holiday candy wrapping along with a long-lost metal steamer insert. Oops.
Slowly but surely—meaning I didn’t commit to ordering a bunch at once—I have been buying Lynk stainless steel drawer inserts to be able to organize everything and be able to easily access whatever it is. (Most of the links in this tutorial link through Amazon’s affiliate program, which gives me a few bucks for my effort to bring you joy.)
I have ordered the Lynk sliding drawer inserts both on Amazon and on Wayfair. You may see on Wayfair that the “discounted” price is the same as Amazon’s price with Prime. Why did I order on Wayfair after ordering on Amazon? Honestly…because my friend owns stock in the company, and I wanted to support their sales. (I said “honestly!”)
Why I chose stainless steel cabinet drawers instead of wood
Is it even a contest? Wood is pretty and it has a warm look and feel. But the heavy stainless steel that I chose means I can really load it up and not worry about cracking.
Lynk includes visual tutorials, all the hardware, and even a template to be able to screw the base in at the right spot. They even tell you which side of the slider should face the bottom and which faces the front of the cabinet. Why isn’t every manufacturer so helpful???
My drawers and cabinets used to be a mess. Now I have neatly organized:
- Sets of Pyrex storage containers which are a Costco staple, a great deal, and are so much better than plastic containers. My entire set with the lids fits in one relatively narrow Lynk sliding drawer.
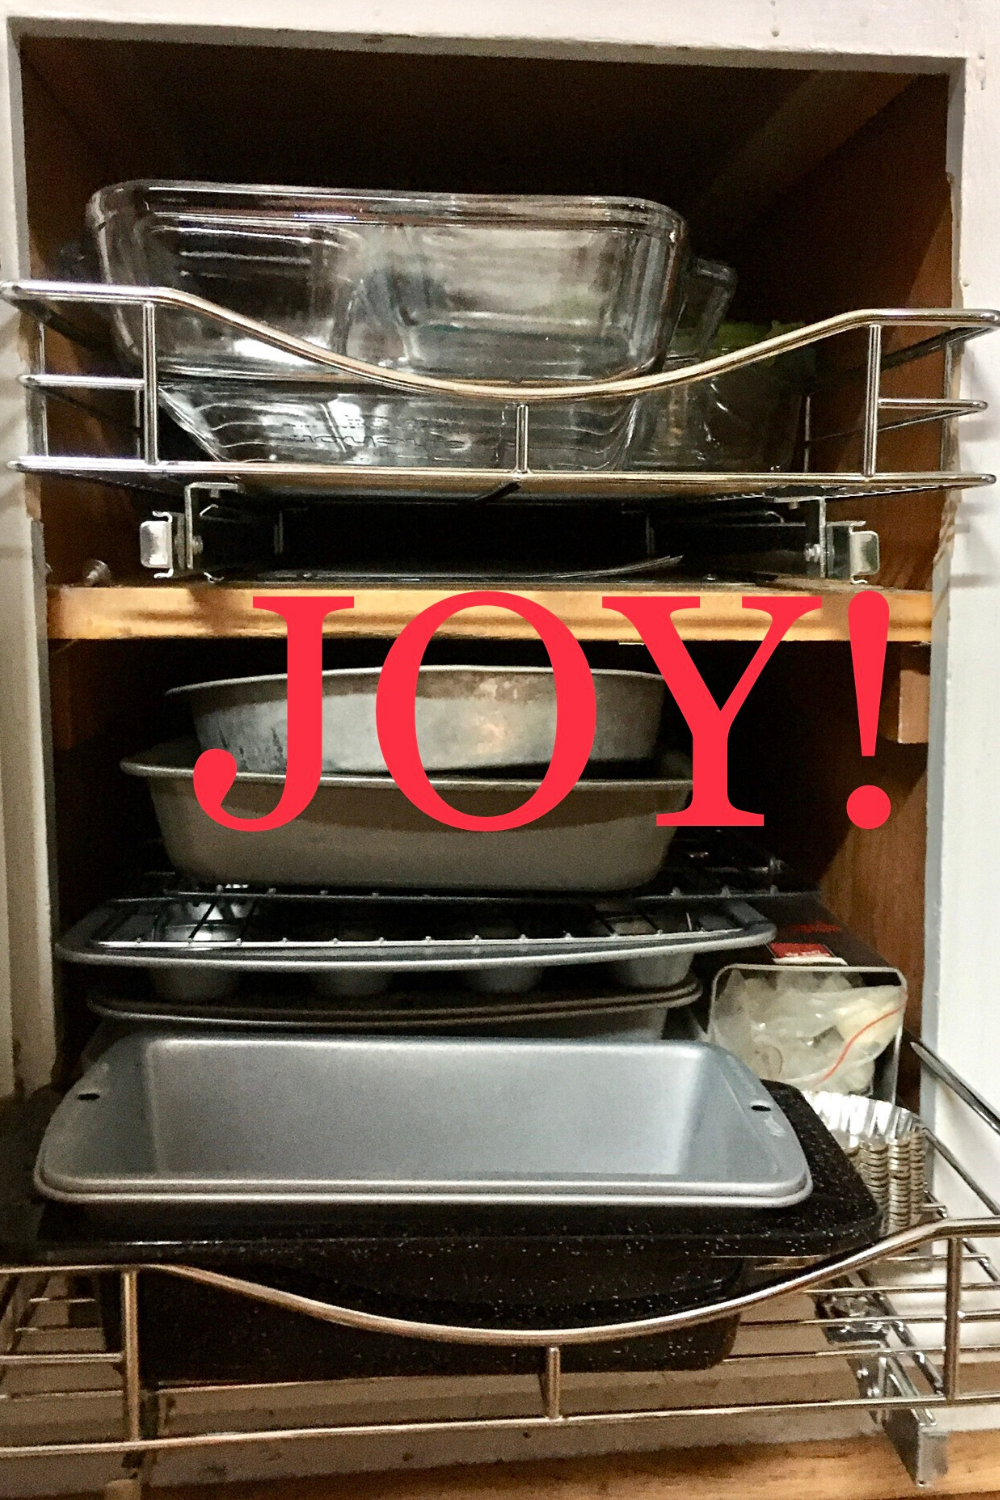
- Baking pans of all shapes and sizes. Honestly I had no idea what 8×8, 9×12 and muffin tins I actually had as they were stashed in 3 different places in the kitchen. Now I’ve nested them in one sliding drawer and have filled in the sides where there was space with loaf tins and other smaller baking tins. I feel like a grownup!
- Frying pans and pots. Sadly I have so many that all the lids won’t fit on my sliding shelf. Someone needs to invent collapsable silicone lids for pots.
- Chocolate and nuts, because shouldn’t those important ingredients have their own shelf?
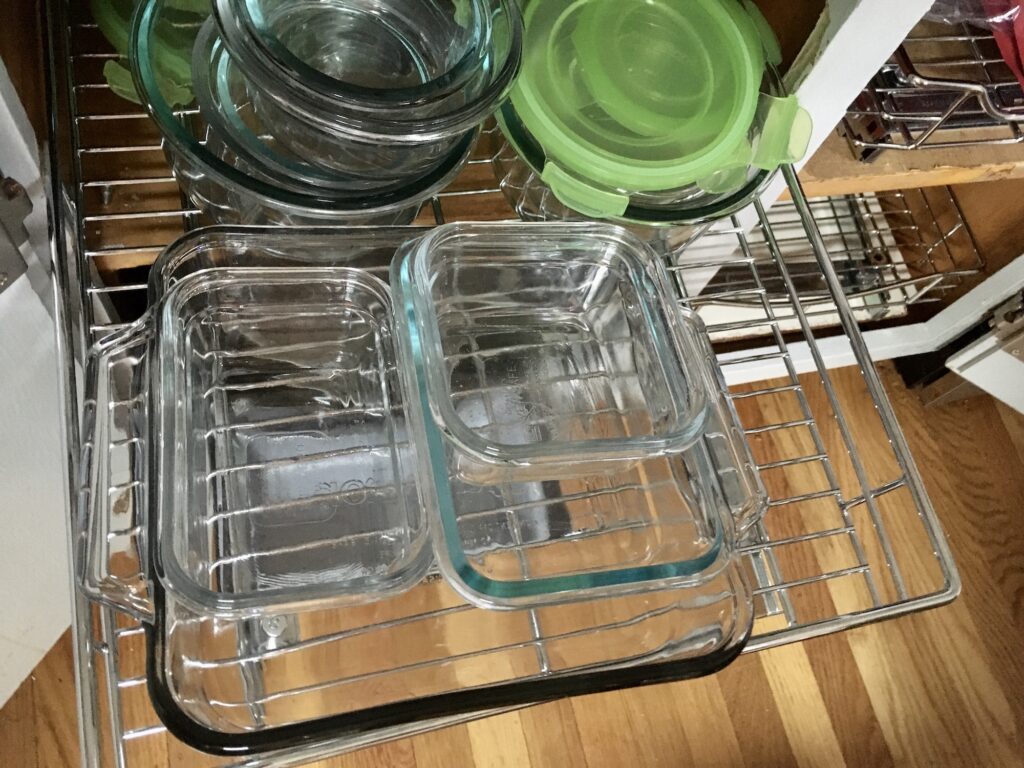
Victory! Pyrex glass containers and lids organized and accessible. (These containers come in a set at Costco.)
IMPORTANT! Before you start ordering and installing your shiny new sliding drawers, you need to figure some things out:
- Drawer height: Know if you’ll need another piece of wood to raise up the sliding drawer so that the drawers pass the lip of the cabinet. I had some old 1/2″ ply
- Drawer and slider width: Decide if you want a lower hassle installation OR if you want to maximize the width of your slider (which I did, hence the list of tools below). If you choose a slider size that is much more narrow than the opening of your cabinets, you might be able to stick stuff to the right or left of the slider. For example, I store foil, parchment, and wax paper to the right of one that was 3″ skinnier than the width of the cabinet. Also, figure out if you’ll need to remove the magnetic door closure. I found my vintage (hardware made in America!) door magnet was blocking the slider. I installed a new door magnet near the center, after finishing the drawer installation.
- Work from the back of the cabinet. Talk about awkward! The task of screwing the drawer slider in at the very back of the cabinet is a bear. If there is an upper shelf you can remove, do that to be able to reach back there. You’ll be glad you have the cordless, battery-operated drill (below) for that task.
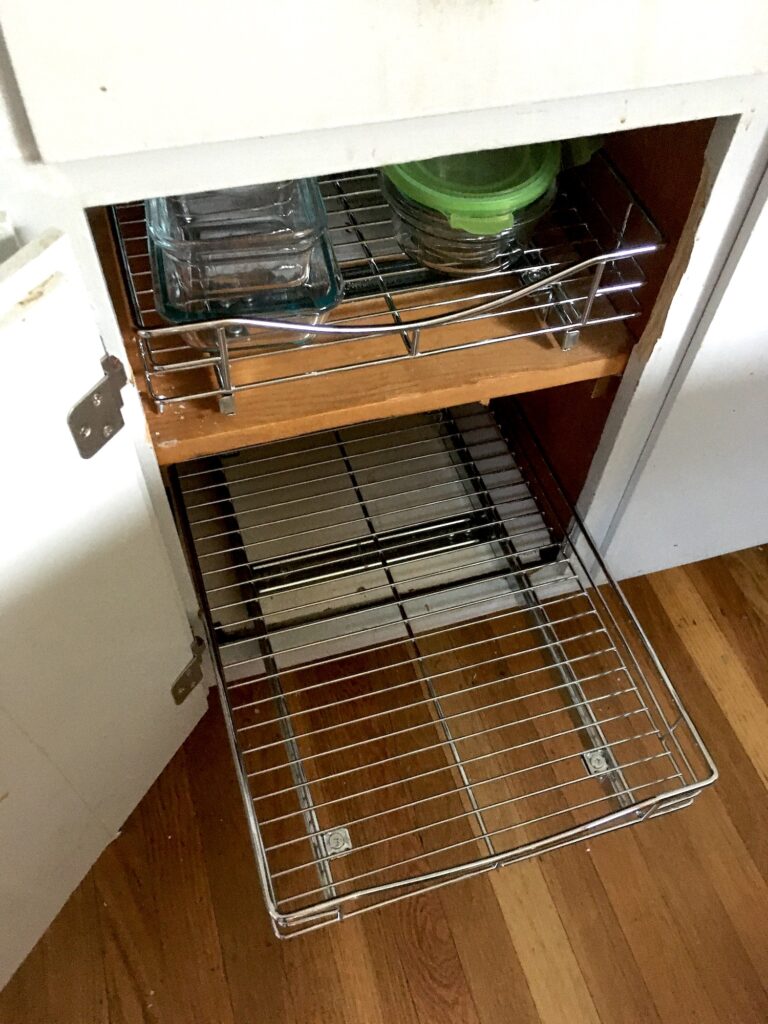
These sliding drawers are such a small upgrade but they bring me so much joy to be able to BE and FEEL organized!
Tidy up and organize under the kitchen sink!
My cabinet drawer insert obsession began a few years ago. It started with a rolling pull-out trashcan cabinet insert, in my rental unit. Not only did my unsightly trashcan disappear from sight, it made me feel, again, like a grownup.
Before you press any Buy Now button, make sure a garbage disposal or any future plans for under the kitchen sink won’t impact your amazing plans. Also be sure to measure the height of the cabinet under your sink to be sure the trashcan and the slider will fit.
Whichever brand of trashcan slider you choose, get one that either lets you use a large trashcan or a smaller trashcan and a recycle bin or bag.
Next was an under the sink supplies organizer. It seemed absurd to spend around $60 simply to organize my sprays, sponges, dishwasher soap, Comet, etc.
Oh, but that “tidy” feeling of not having everything scattered, falling over, under the sink is worth the expense.
This organizer may be hard to fit in if you’re installing a trashcan slider and you have a garbage disposal.
So definitely make sure to measure first! You know what they say, measure first, cut once. Especially important when it comes time to cut into your house (or your landlord’s house).
You’ll need some tools for installing cabinet sliding drawers:
-
- a pencil! You’ll use this to mark exactly where to screw the sliders into the cabinet (or in my case, screw them into a board that raised the sliders up
- a 6-8″ Phillips head screwdriver which you will use to screw in the large screws that hold the drawer to the rails. You don’t want to use an electric drill for this. Better not to tighten too much. If your screwdriver is too long, it will be hard to reach the screws in the back.
- an electric drill with a Philips head drill bit. If you too want to be handy at home, invest in a nice cordless drill. I went with Makita but my construction friends say they’re pretty much alike. (I personally wouldn’t buy a Ryobi which is HD’s private label brand.) Makita and Milwaukee are what most pros use. I invested in the Makita kit with a cordless drill and impact driver shown here. #badass! With this kit, I’ve installed the drawers, blinds, and repaired more things around the house than I care to remember. If you’re not hep to impact drivers, know that they are super powerful and that slower rotation is key to excellent screwing. (You may commence the screwing jokes now.) Not ready to commit? Amazon seems to be short on Makita drills! Your local hardware store or Home Depot sells them too but the bundle on Amazon is a really good deal.
-
- a chisel. Chisel, where have you been my whole life? At one point I removed trim from around my kitchen cabinets (when I decided to install a subway tile backsplash. Did I say bad ass?) I got a set of chisels which I have determined are the superpower of handymen and handywomen. They don’t want you to know how amazing chisels are, but I want you to know! I’ve even attacked super weeds in the gutter with my chisels. You may not need a chisel or hammer, if your drawer inserts are clearly more narrow than the cabinet. I wanted to maximize space on the slider, thus the tight fit.
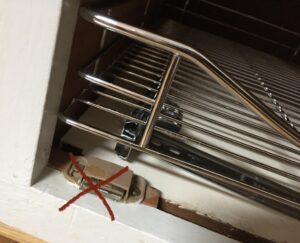 a hammer to hit the chisel. Bang bang! I chipped off a little of the edge of the cabinet opening as the sliders were about 1/8″ too wide. No one is going to look at those chipped out parts unless I sell the house. By then surely someone will have painted over those chips. As you may have guessed, that painter will likely be me.
And yes, just as you wear gloves for making food, you should have a sturdy pair of work gloves whenever you’re handling heavy machinery or even hammering.
Even if you never install drawers like these, it’s good to have such gloves around in case of emergency.
Costco and HD tend to have multi-packs of gloves. Or you can get one really good pair and keep them clean.
The exact steps to install the cabinet sliding drawers:
- Determine if your drawers need wood to raise them up to the right height, so they’ll slide out. If so, be sure that wood is larger than the rails and fits into the cabinet. (I know, that’s obvious.) 🙂
- Determine if you need to make the opening of the cabinet any wider.
- Once you take care of #1 and #2, position the rails and drawer to know the perfect placement in the cabinet. (See photo and tips below. This is the most important step!) Use a pencil to draw where the screws that hold in the rail should go. (If you are using a piece of wood to raise the rails, you’ll be drawing on that wood.)
- Screw the rails into place using the pointy screws; if you are using a piece of wood do this before putting it into the cabinet.
- Make sure the rubber pieces that pad the back 2 screws have their holes lined up so the drawer and the rail can be easily screwed together.Now insert the wood into the cabinet (if you’re using a piece). Attach the drawer to the rails with the fat screws, which you can hand-tighten to begin with. Use your Phillips head screwdriver to tighten those screws.
And, as some people, say “Bob’s your uncle!” No I don’t know why they say that either.
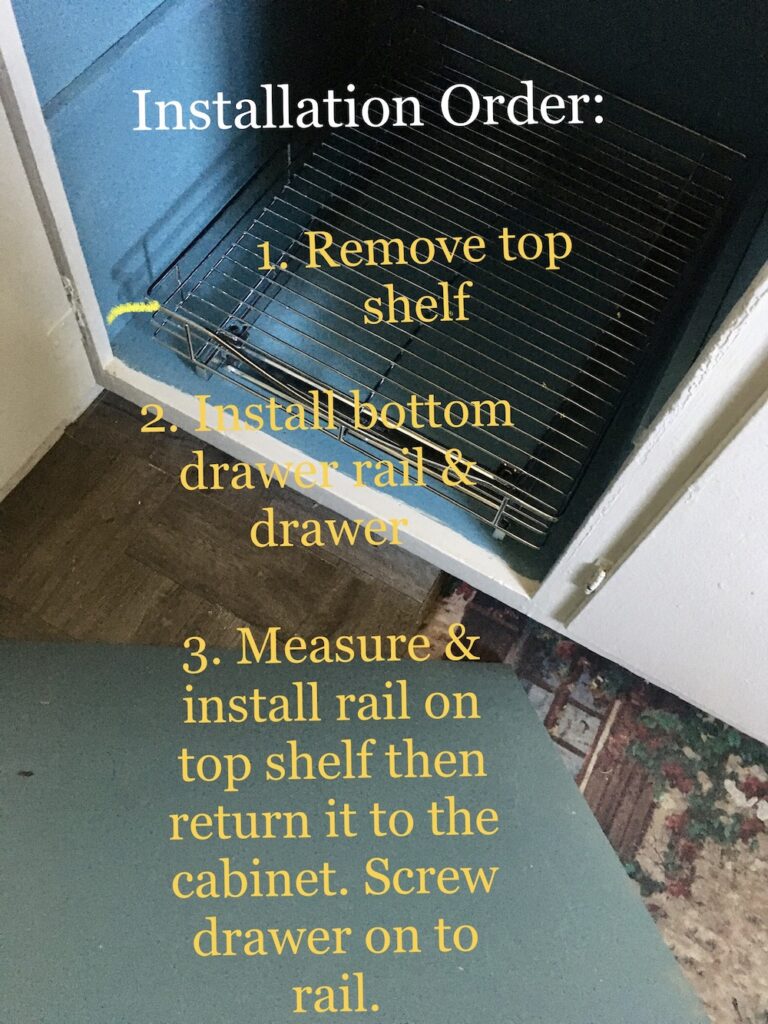 Tackled the bottom shelf first: Remove the top shelf after measuring and marking with your pencil where the rails should go — screw the drawer by hand on the rails to do this to be totally sure your back screws will be in the right place. Then, install the rails on the bottom shelf and if possible screw the drawer in. (You may find out the drawer won’t fit and you’ll have to take it off and install it once the shelf is back in the cabinet.)
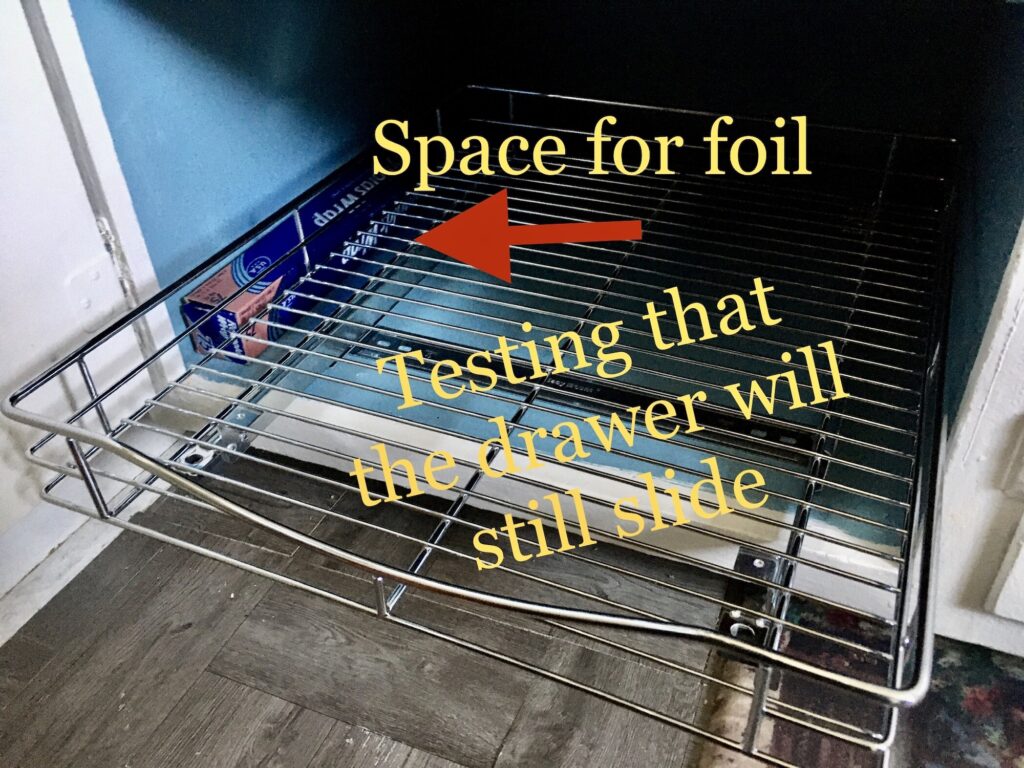
Test and test the perfect position! Decide if you want to center your drawers, or do what I do: See if moving them to one or the other side of the cabinet will leave space to store cutting boards, foil, or other slender things. I tried moving the drawer to the left then realized since the cabinet door hits the wall it would take more space to open the drawer. So I ultimately positioned it as shown in the photo.
I hope if you have been putting off your kitchen cabinet organization that the passion I have exhibited here for the sliding cabinet drawer inserts inspires you to explore your options!
Happy to answer any questions too, and I appreciate any feedback.
Click to get your own Lynk Professional Organizer Pull Out Under Cabinet Sliding Shelves !


